"Free cloud instance for ADF like apex.oracle.com which is available for APEX".
And fellow Oracle colleague Steven Develaar seems to get no sleep dreaming about live samples:
The sample application of this blog post is kind of "Hello World" for ADF and Bounded Task Flow, so the main focus is on using JDeveloper Maven integration (available since R2) to create, package and run it.
The sample leverages a subset of the framework: ADF Faces components (view) and Task Flows (controller). As the cloud platform in this case is actually based on Tomcat 6, so the steps used to get it running on Cloud Bees java platform could be useful in case someone wants to run it on a Tomcat locally. Important aspect: the platform is not certified and supported to run ADF, so please don't expect to much, especially to get a complete ADF stack up and running on it without efforts.
Oracle Public Cloud was announced (again) last week - if you are in a position of having an account, so there shouldn't be a challenge to deploy and run full ADF application stack on it - as stated here it is ready to run ADF stack.
Being not in the position yet i proceed with description of my sample.
The application, available to download and run it in JDeveloper R2, should look upon a start like this:
Actually, if you see something like "ADF Task flow running..." in the area above this text - it is the sample application running in java cloud.
UPDATE: Recent power failure and associated infrastructure failures in Amazon US-EAST-1 impacted several high profile services and also this ADF sample application - the application was restarted again.
You can click, for example, on a button next to become familiar with functionality of it. It is embedded in this blog post:
There is one page home.jsf with one bounded Task Flow named sample-task-flow, embedded as a region on it. Application scoped managed bean CounterBean.java is used to provide "rich" functionality of the sample: to display start date, and to count page views of two page fragments in a bounded task flow.
Lets go trough the steps used to create, package and deploy it.
Using JDeveloper R2 + Maven integration to create the sample ADF app for java cloud (in 5 minutes :)
We start in JDeveloper with New -> Application -> Maven Application:


Note: Once you create a Maven application and project, JDeveloper also takes care about keeping Libraries and Classpath in Project Properties and dependencies in pom.xml in sync - very nice and helpful.
Our project is quite new at this stage - there are no dependencies at the beginning.
We just tailor one setting for now: go to Project Properties -> ADFm Sources and change ADFm Source Directory to point to ...src\main\resources like this:

The other JDeveloper project properties were already set by the wizard:
- Project Source Path points to ...src\main\java
- Output directory points to ..\target\classes
- Project-> Resources look like this:

The steps used to create web content (fast forward)
Create ADF bounded Task-Flow in JDeveloper following default settings all the way: New->JSF/Facelets: ADF TaskFlow: ok. Task flow named task-flow-definition.xml is created.
Open it, drag&drop two view components , provide two control flow cases and names for them:

Java class CounterBean.java was created, JSF2 annotations @ManagedBean and @ApplicationScoped were used to put it into the scope of this sample. ADF panelLabelAndMessage and outputText components were used on UI pages of it. The picture of our sample Project in JDeveloper provides an overview of the sample.

Maven pom and Jdeveloper project libraries - what happens in a background
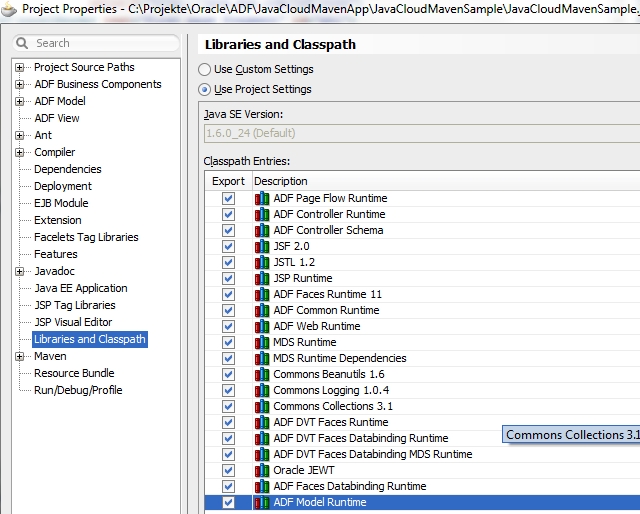
As already mentioned, JDeveloper takes care about Project libraries and Maven pom dependencies for us. Once some application component gets created, the required libraries are automatically added to the project settings and maven dependencies:
JDeveloper project libraries at this stage:

Few tweaks to get it up and running on java cloud
You might already guessed - there should be something more. Of course. Tomcat based java cloud platform is not certified - some manual "tweaks" are necessary to get the sample up and running on it.
- Add 2 JRF libraries as maven dependencies in JDeveloper-> maven settings to pom (Tomcat doesn't provide JRF Runtime libs - we need to provide them together with our application):

- Add one context param to web.xml - to switch pretty URLs off :
- The sample project contains one CloudBees platform specific deployment descriptor: WEB-INF\cloudbees-web.xml. The descriptor provides a name (or application id) of bees application created for this sample- in this case <appid>mavenproj</appid>.
- Only for embedding ADF application as iframe pointing to different domain - frame busting context param was set to never in web.xml to prevent the application "pop-out" from this blog:
- Trinidad jars trinidad-api.jar and trinidad-impl.jar were copied manually from JDeveloper library locations into application directory WEB-INF\libs to overcome some lib compatibility issue.

We can use Maven package goal to package it as war, for example direct in JDeveloper like this:

And the log output in case of normal execution shows a successful build and one webapp packaged as JavaCloudMavenSample-1.0-SNAPSHOT.war:

That's all - the section how to create ADF sample app for java cloud in 5 minutes is finished.
Our application is ready - its time to test and deploy it.
Deployment to CloudBees java platform
GettingStarted provides few ways how deploy java application to the platform (called RUN@Cloud). One of them is to download SDK and use CLI (command line interface) tool.
Note: the CLI is normally cloud service vendor specific - for this platform the command line utility is called bees.
Once SDK is downloaded and configured - it can be used to create and deploy applications on the platform.
You have also to sign up to the platform and subscribe for run service - like always before using some service on the Internet. There is also a free subsciption to start, limited in resources, but enough to run the sample of this blog:
Using bees console (CLI), test the application , packaged as war, locally first:
>bees app:run target/JavaCloudMavenSample-1.0-SNAPSHOT.war
Note: one error message (besides some other messages) is displayed: oracle.jrf.UnknownPlatformException: JRF is unable to determine the current application server platform.
It is ok - the platform is not certified, oracle JRF doesn't know it and the Exception states exactly this.
Once the sample is running and responding locally (http://localhost:8080/faces/home.jsf) , it can be deployed to java cloud platform by issuing a command:
>bees app:deploy target/JavaCloudMavenSample-1.0-SNAPSHOT.war :
Conclusion
Following description in this blog post we created a simple ADF Application leveraging View (ADF Faces) and Controller (Task Flows) part of the stack. We used JDeveloper Maven integration to set up Maven project structure and to package it.
And finally we followed the principle of java "write once - run everywhere" and got our ADF application (ADF is java standards based framework facilitating an easy usage of it declarative way) running "everywhere" - locally and in a public java cloud.
The sources of this sample are available at github.